AV Sequences, or presentations, have have been a standard in Camera Club photography, but have seen a decline in popularity in recent times, and were dropped from the Croxley programme in 2021. However we have brought them back this season as an experiment and if popular will feature again in next year’s programme.
So what is an AV sequence,… well the RPS says this about them:
Audio Visual presentations, or “sequences”, can range from interpreting music, poetry or song, to stories and documentaries on subjects as varied as nature, travel and tourism, topical issues or historical events. They can be humorous, educational, campaigning, inspiring or eccentric. AV is much more than “pictures to music”! AV at its best has the power to touch people’s hearts, communicate feelings and emotions, and to change people’s lives.
How to Make and AV
Probably the best starting point is to look through your back catalogue and find a group of related images, such a:
- Taken at the same place
- Have a similar subject or theme
- Or possibly share the same photo technique, like ICM
The individual images do not need to be “competition winners” themselves. What’s more important is that they fit a story; there’s no need to edit them to perfection in Photoshop, straight of camera is good enough.
After you have identified a set of images, look for some music which fits the story. You can use more than one piece if you wish and you can also chop your music into sections then only only use the parts your want.
If you don’t have any MP3s then you can choose from the music library the tools usually come with.
After you have chosen your image files (and music) it’s time to upload them into a video editor so you can put you AV sequence together.
There are many editors you could use:
| Editor | Mac | Windows |
|---|---|---|
| Clipchamp | ✔ | |
| Open Shot | ✔ | ✔ |
| Short Cut | ✔ | ✔ |
| Movavi | ✔ | ✔ |
| Windows Photos | ✔ | |
| Write on Video | ✔ | |
| Final Cut Pro | ✔ | |
| Vimeo | ✔ | ✔ |
RPS Materials
The RPS has a large amount of material on AV Sequences:
And here’s the example from the RPS Steve used in his presentation:
Making an AV with Clip Champ
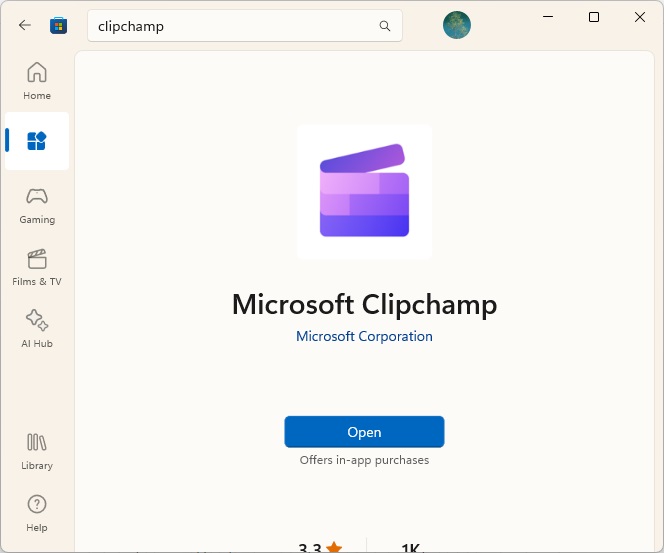
For Windows users, Microsoft offers a simple but powerful powerful video editor called “Clipchamp”, which is more than enough for making AV sequences. Clipchamp is free to download from the Microsoft Store but does require you have a valid Microsoft account. Download it from the Windows Store:
There are many YouTubes on ClipChamp. This is one is dedicated to making AV sequences. He does go to town on all the bells and whistles, but it does illustrate what can be achieved:
After watching the Youtube, I suggest the following steps to make your first AV after installing ClipChamp
- Look through your image library for picture which tell a story together
- Resize the images so they’re no larger than HD resolution (1920×1080) to make them easier to handle.
- Chose music from your music library (if you have one)
- Put the resized images and chosen music in Windows folder
- Start ClipChamp and select Create a new video:

- From the your media tab, use Import media to upload the images and music from the folder created above:
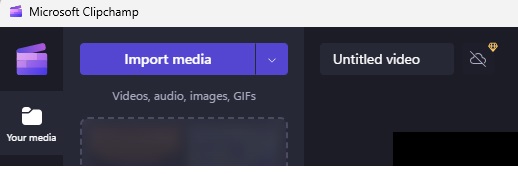
- As per the Youtube, add all the images to the timeline and arrange them in your desired sequence (don’t worry about the length of time each image is on screen for at this stage, just get them in the right order).
Handy tip
This button zooms the display so the entire time line fits on the screen

- As per the Youtube, the default display time for each image is 5 seconds, which maybe too short or tool long for your AV. To change the display length of all your images in one go then select them by by drawing a box around them, then using the handle on the last image, drag it left or right to alter the display time.
Handy tip
After shrinking the display times, the images will have gaps between. Right click on any gap to reveal the Delete all visual gaps button

- As per the YouTube now add your music from either your Imported media or from the ClipChamp built-in music library.
- Position the music on the timeline where you want it to start, for example you may want it come in a little after the first image is on the screen.
Strong Advice
Make sure you are happy where the music starts as moving it later will undo the work in the next step!
- If you play your video now, its highly likely that your image transitions are not aligned to the music. Making them change in time is manual process unfortunately. which you may decide is not worth the effort. The process is to move the start and end of adjacent images (using the images tabs) until the transition happens where you want it. Clipchamp snaps images together on the timeline so any gaps are easily removed.
Handy tip
Zoom in on your time line and use the audio waveform display to help determine where a transition should happen:
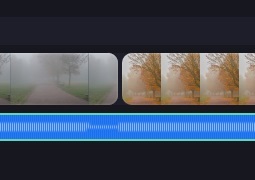
Here you can see the transition between the images has been aligned to the next loud section of audio. You need to be very zoomed in though to get this level detail.
- After you have aligned your transitions you may care to add some overlay text at the start and end of your video. As per the YouTube, there are many styles to choose available under the text tab on the left hand side
Handy tip
It’s only possible to edit text when the timeline cursor is actually over the text event!
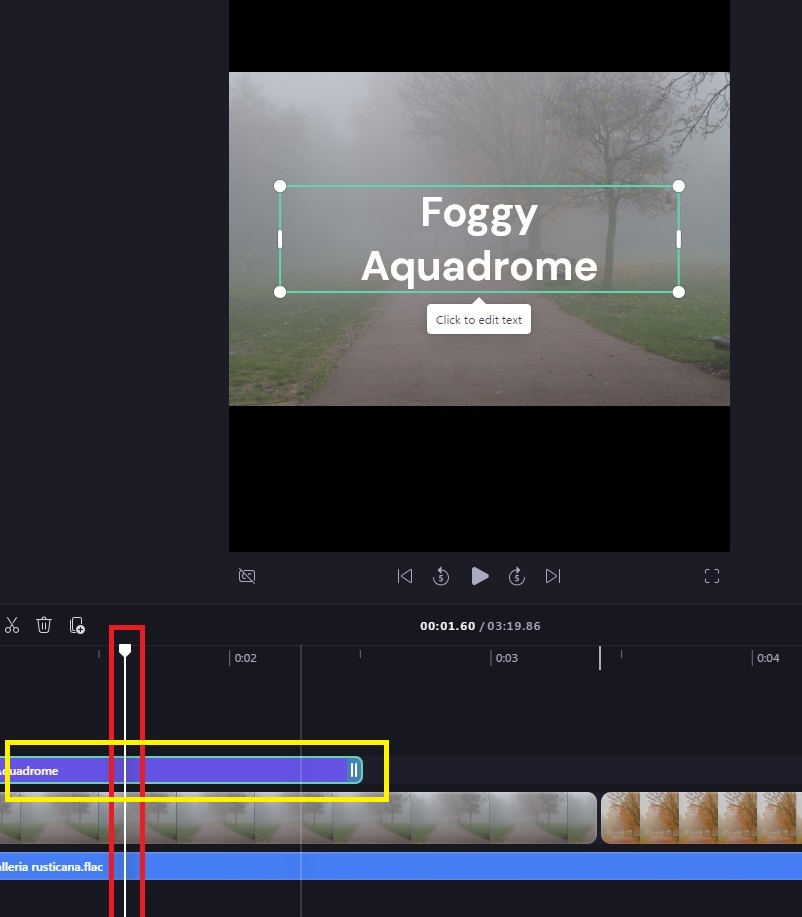
The editing box for a text event only appears when the timeline cursor (red highlight) is over the text event itself (yellow highlight in this example)
- After you have added any text elements to your AV, you can then add transition video effects as per the Youtube.
Gentle advice
It’s easy to go overboard with the transition effects, and if overdone can detract from the story of your AV!
- Finally remember to trim your music track if it extends beyond the end of your picture time line. To do this use the split tool on the audio track to divide the audio track into two events. The first event will be the section of the audio needed for your images, the second event will be the unused part you can delete.
More detail on splitting
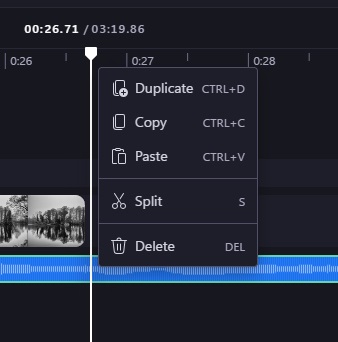
First place the cursor at the end of your image timeline (or where you want the music to end), then right click on the music event to reveal the Split feature
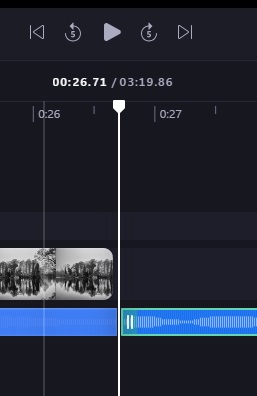
After clicking Split, the audio track will be broken in two leaving you to delete the unwanted portion (highlighted in green here)
- After you have trimmed your music to the right length you can export your finished AV As per the Youtube click on the Export box at the top right of the screen and select the 1080p option. Your finished AV will be deposited in the Downloads area of your computer as an MP4 file.
- As ClipChamp is a cloud application there is no need to “save” you work, everything will be as you left when you next start the application so feel free to exit from it any time
Demo AV Made with ClipChamp
Stop Motion Animation
If you’d prefer to try your hand at a stop motion video rather than an AV sequence then there is a brief video how to make these in the Members Area. Search for 2nd July on the page


